let’s talk about Oracle Cloud Private DNS. Private DNS service in OCI allows you to define your own DNS resolver name.
There are three components of Private DNS:
- Private DNS Zones: These contain data only accessible from within a Virtual Cloud Network for example private IPs. It provides responses only for clients that can reach it through a VCN. You can duplicate zones across VCNs.
- Private DNS Views: It is the collection of Private DNS Zones. It is referenced from a Private DNS resolver to manage how DNS queries are answered. Multiple private DNS resolvers can also use it.
- Private DNS Resolver: This is the one that responds to the DNS queries. It follows a pattern to provide a response to a DNS query this is depicted in the below diagram.

Let’s dive into setting up Private DNS. Firstly, you will have to create DNS Zone, followed by DNS views and then DNS resolvers.
Create Private DNS Zones
You can follow the steps to get the DNS ZOne creates.
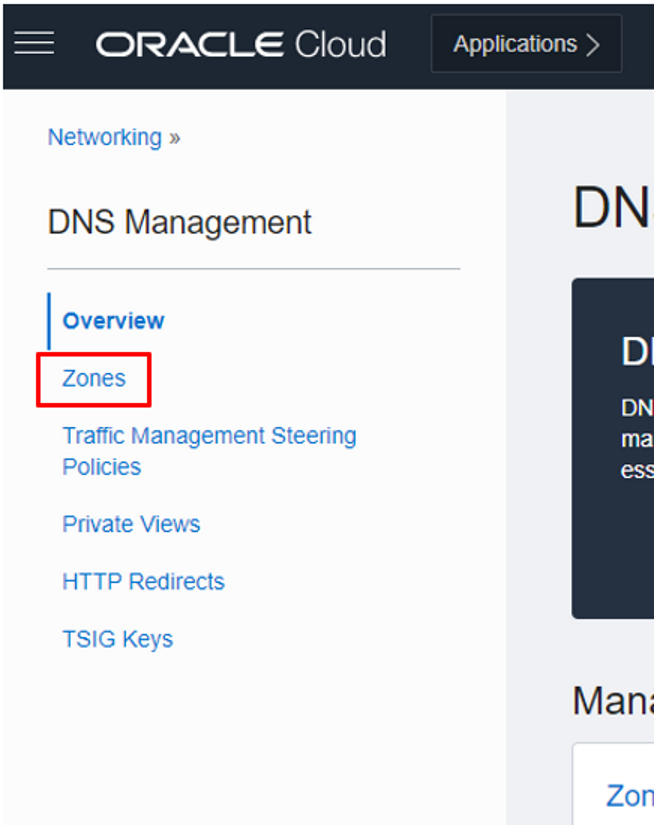
1. Navigate to Networking and under DNS Management, click on Zones
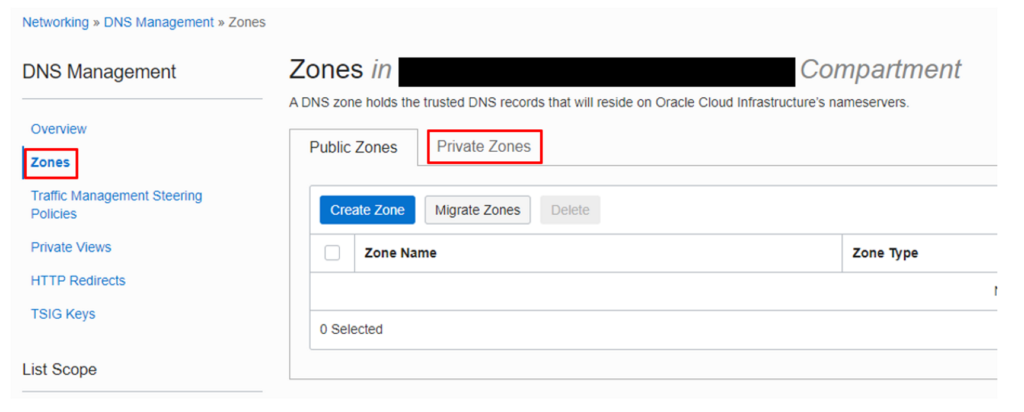
2. On the Zones page click on the tab Private Zones and click on Create Zone.
3. Provide below details:
- Zone Name: e.g. abc.xyz.com
- Select the right Compartment.
- Zone Type (read-only field)
- You can choose the existing DNS Private View or create a new one in the DNS Private View box. As I am building Private DNS from scratch, I will select Create New Private View and proceed. Note: The Private View will be created in the same compartment as Private Zone.
- In the Name text box, provide a meaningful name for the new private view.
- Optionally you can provide Tag by clicking on Advance options.
- Now click on Create.
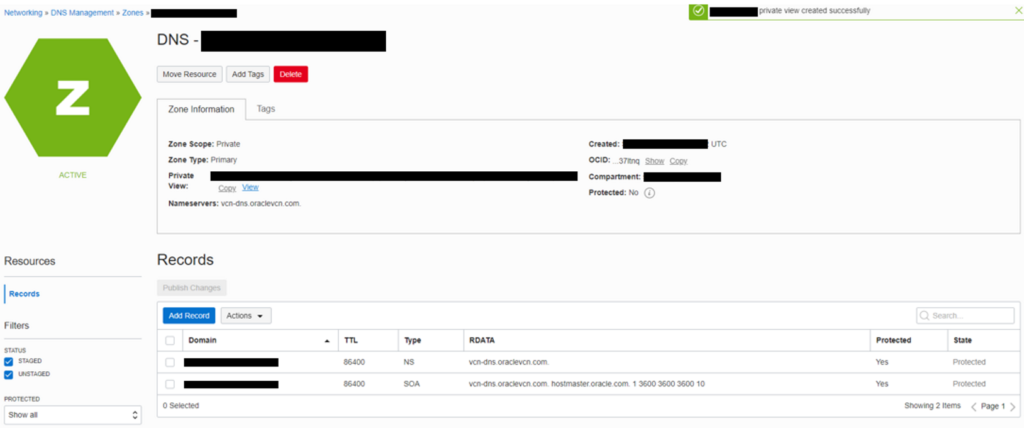
The details of the zone will appear after completing the necessary SOA and NA records.
Follow the steps below to associate DNS Private View with a DNS Resolver.
1. Navigate to VCN for which you intended to use the Private DNS.
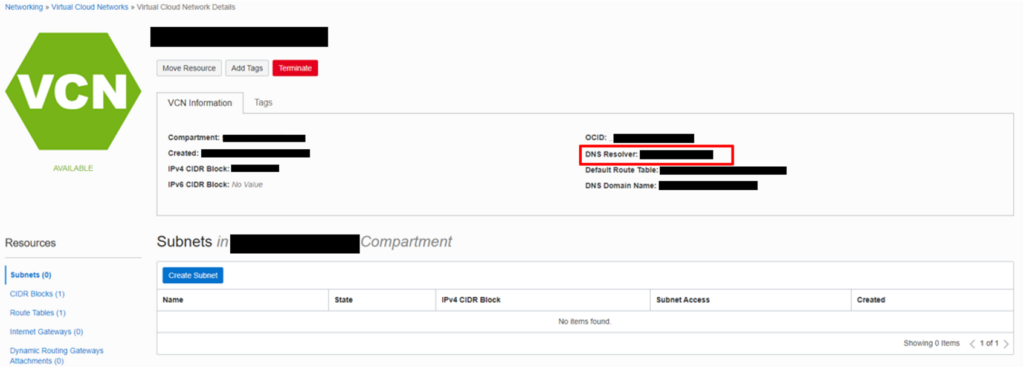
2. On the VCN Information tab you will find a link next to DNS Resolver. Click on the link to display private resolver details.
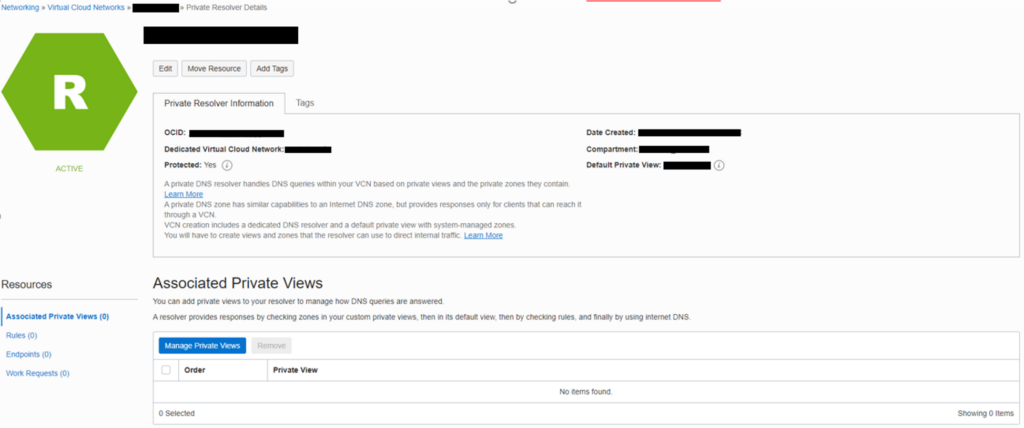
3. On this page click on Manage Private Views and provide the name of the Private View created while creating a private zone. Once done, you will be able to see a line added to the Manage Private Views Table.
Thanks for reading my blog, I will be delighted if you can provide me with your feedback. It will help me to improve my future blogs.